Editing scanned pages
Contents
The Editing tab consists of three subgroups: Processing, Rotation, Scaling, and Correction.

Processing
The Processing group contains buttons for the following operations: Restore, Auto Crop, and Auto Split.
The Restore button rolls back all the editing operations done on the current page and restores the original page received from the scanner.

The Auto Crop button removes any unnecessary white or black margins from the current page. If you turn on the Auto deskew
 and/or Auto contrast
  options on the Scanning tab, ScanPapyrus will also automatically deskew the image and/or adjust its brightness/contrast.

If you turn on the Auto split option, each page will be considered to be a pair of facing pages and split into two separate pages, the left one and the right one. It means that the current page containing an image of a book spread will be replaced by two pages, each containing one book page. For the operation to be successful, the book spread must be oriented horizontally, that is, in the normal book-reading position.

Rotation
The Rotation group contains buttons that allow you to rotate a page 90 degrees (clockwise or counterclockwise) or 180 degrees, or by an arbitrary angle.
The Turn Left button rotates the current page 90 degrees counterclockwise.

The Turn Right button rotates the page 90 degrees clockwise.

The Flip Image button rotates the page 180 degrees, that is, turns it upside down.

The Rotate Angle button allows you to rotate the current page by an arbitrary angle (for example, 89 degrees counterclockwise or 89 degrees clockwise).

If you click the button, the page list on the right will be replaced with the rotation control panel.
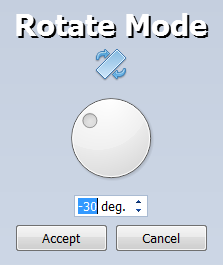
Turn the wheel on the panel with the mouse to specify the rotation angle. Turning the wheel will rotate the page in the preview pane, so that you can immediately see the result of the rotation. Alternatively, you can set the rotation angle by using the text field below the wheel. After specifying the angle, click the Accept button. The rotated page will be fit into a white rectangle.
Scaling
The Scaling group contains buttons to change the viewed page size. The actual page size will not be changed. You can also change the scale by rotating the mouse wheel. The current scale is displayed in the status bar below. The Scale text field allows you to set an arbitrary scale.
Clicking the Zoom In button will increase the scale by 5 percent.

Clicking the Zoom Out button will decrease the scale by 5 percent.

Clicking the Fit to Window button will set the scale in such a way that the whole page fits in the application’s window.

Correction
The Correction group contains buttons to modify pages. Here you can manually crop a page or adjust its brightness/contrast.
The Crop the Image button allows you to remove the margins.

If you click it, the page list on the right will be replaced with the cropping control panel.
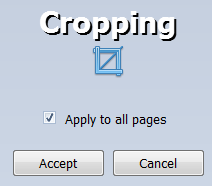
A blue dashed rectangular outline will appear on the page.

Use the mouse to resize the rectangle.
Hover the mouse over a side of the rectangle. When the mouse pointer turns into arrows, hold the left mouse button and drag that side of the rectangle. This way, you can resize the rectangle. You can also move the rectangle within the page. To do it, hover the mouse somewhere inside the rectangle, hold the left mouse button and drag the rectangle. This way, you can move the rectangle.
When you are satisfied with the rectangle size, click the Accept button. The part of the page outside the rectangle will be cut off. As a result, only the part of the page inside the rectangle will be left.
To cancel the cropping, click the Cancel button.The Apply to all pages checkbox allows you to apply the specified page cropping settings to all the pages in the project.

The Image Contrast button opens the brightness/contrast adjustment window.

In that window, you can see the preview pane and two slider bars, Brightness and Contrast.
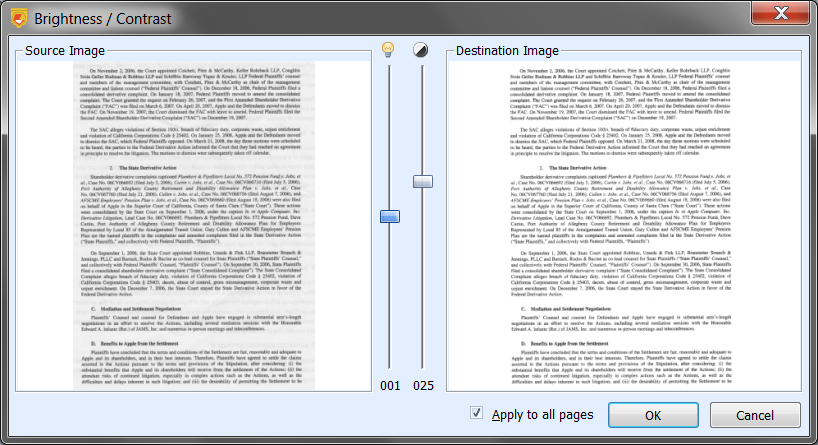
If you use any slider bar to adjust the brightness or contrast, you will see the result in the preview pane (Destination Image).
After adjusting the brightness and contrast, click the OK button. The changes will be applied to the page.
If you check the Apply to all pages checkbox, the specified brightness/contrast adjustment settings will be applied to all the pages in the project.

See also
Scanning
Composition
NAVIGATE
ABOUT US
ScanPapyrus Team develops home and office applications for Windows. Our programs are known for their high quality, user-friendliness and comprehensive design.
PARTNERS
![]()