
 GERMAN
 FRENCH
 SPANISH
 DUTCH
DUTCH POLISH
 CZECH
CZECH
How to scan a book properly
It is really easy to scan a book yourself.
To scan a book on your home scanner, you will need ScanPapyrus software. ScanPapyrus helps converting a book to the digital copy.
ScanPapyrus helps converting a paper book to the digital copy.
Without this program, the scanning process will be more complicated. Let’s imagine you don’t have ScanPapyrus and you want to scan a book.
First, let’s count how many pages are in your book. 100? 200? This means you have to perform the scan 200 times. 200 times will the scanning head go along the scanner glass. Surely, you could scan the page spread in one go and then manually separate pages.
Ok, let’s say we scanned 100 page spreads with 2 page son each one, then we separated them to 200 individual pages. So, now we have 200 files with images, and we need to compact them into a PDF file. So we have to find an app that can do this, see if it can do what we want, then may be look for another one, etc.
With ScanPapyrus the process is way simpler.
First, ScanPapyrus is an all-in-one package. It contains tools for scanning and editing images as well as exporting them to various formats (PDF, DjVu).
Second, with ScanPapyrus you don’t have to run scanning of each page individually or waste time separating page spread onto two pages. You simply scan the entire page spread and ScanPapyrus automatically makes two individual pages from it! And that is it! You don’t have to do anything except this. The rest is done by ScanPapyrus.
Combined with automation capabilities, scanning a book becomes extremely easy. Run scanning in the automatic mode, and simply feed the scanner with page spreads, one by one. The program receives images from the scanner and splits them into pages. Plus, pages are automatically processed too – the program removes unnecessary margins, fixes sloped pages, lightens the background. As the scanning finishes, you simply select the output format: DjVu, PDF, or a set of images for further OCR.
Let’s see the book scanning process in details.
Running the book scanning
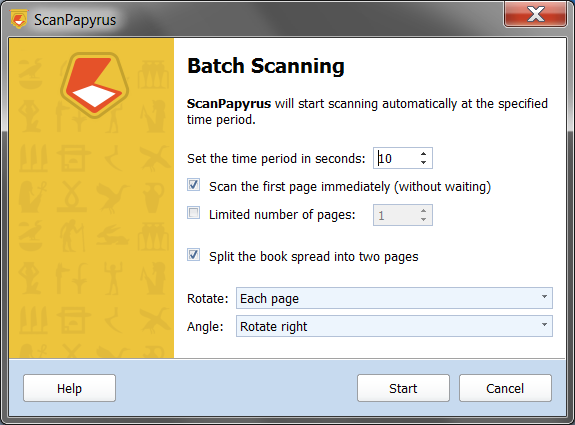
To start automatic scanning of a book, click the Batch Scan button on the toolbar. The scan wizard opens. Specify the scanning interval in the wizard. Since image processing and splitting into pages takes some time, 3-5 seconds are enough to flip the page of the book and put the next page spread on the scanner. You may leave the lid raised if you want: ScanPapyrus will cut off unnecessary margins automatically.
The “Scan the first page immediately” option means the scan process starts right after you click the “Start” button. If the option is off, the scan runs after the specified scanning interval expires.
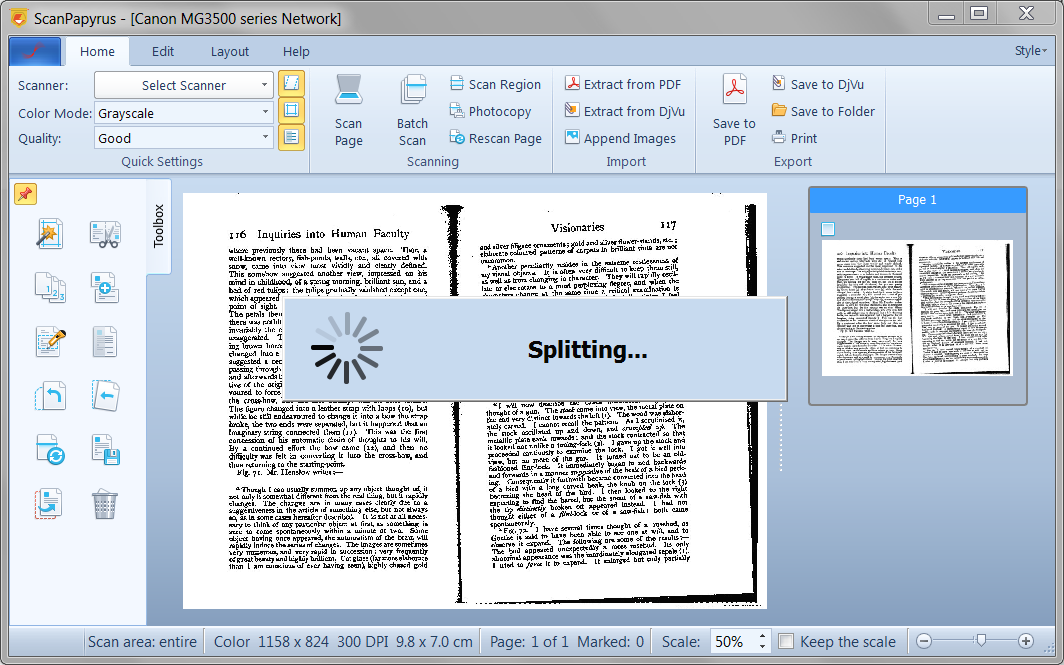
The “Split the book spread into two pages” option is the most important when scanning books. It is this option that separates scanned images into two individual pages. If the option is not set, ScanPapyrus treats the scanned image as a single A4 sheet.
So, turn on the “Split the book spread” option, place the page spread on the scanner glass, and click the “Start” button. The scanning begins, and the page spread is scanned.
Processing the obtained image
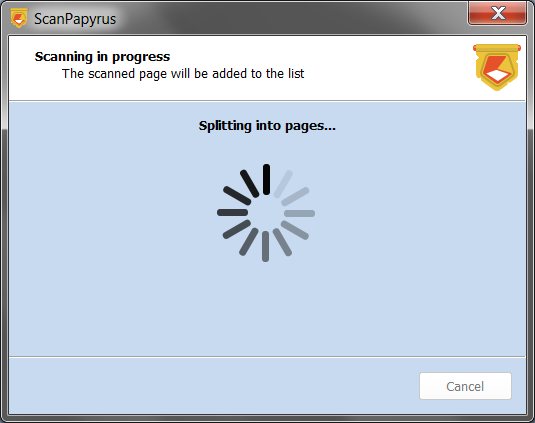
As soon as the scanner finishes scanning, image processing begins. According to specified settings, the following actions are taken:
1. Image processing: that is, black bands and excessive margins are removed, the background is adjusted to be more white, and sloped and curved images are fixed, which means if the book is put on the scanner at some angle, this angle is compensated.
2. Image separation to two individual pages.
Let’s look at the latter option in more detail. The program uses the fold line as an indicator of page divider. If there is not one, the result could be unpredictable. However, when you scan a page spread of the book, the fold line is always there.
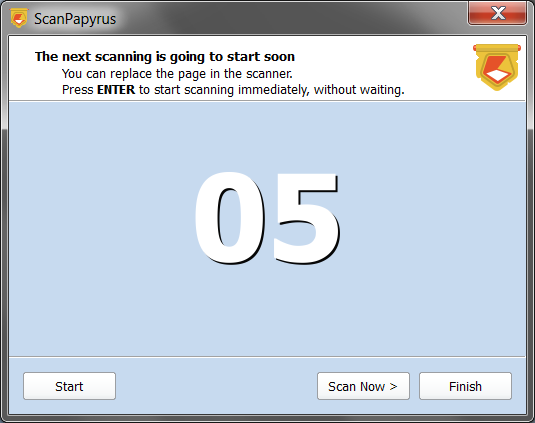
Scanning the next book spread
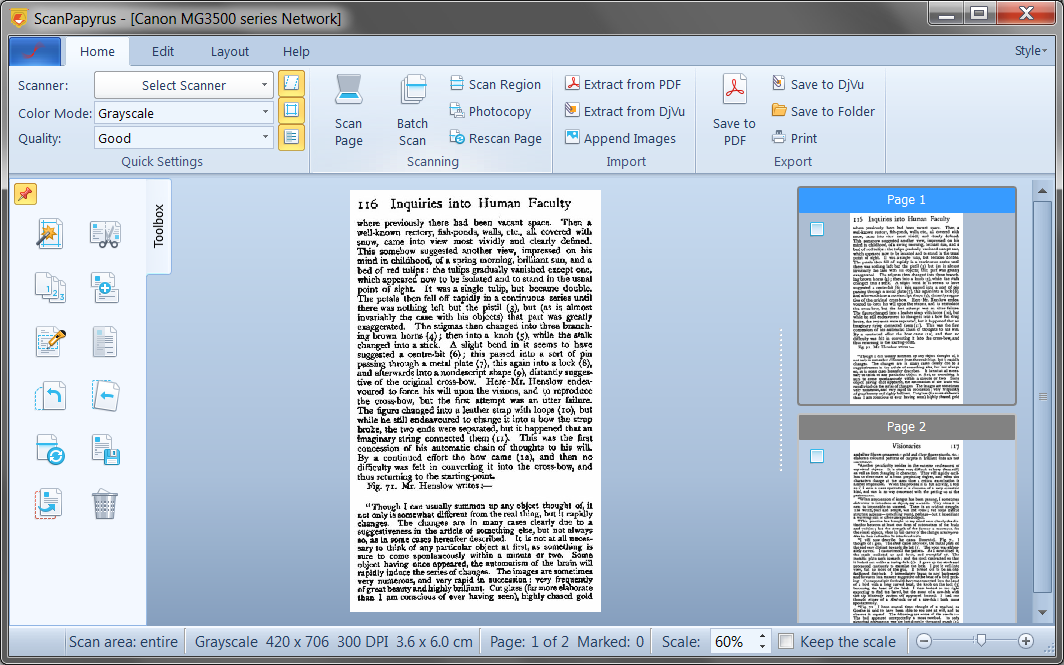
As a result of the previous step, you’ll get two pages, and they are already added to the project. You can see them in the list of pages. While it is important to place the book in the right direction, even if you put it upside down, you can simply use the Rotate function of the program to quickly turn such images the correct side up.
On the third step, the program waits for a specified delay, so you can flip the page and put the next book spread on the scanner. You can stop the timer with the “Stop timer” button or simply pressing space on the keyboard. When you finish scanning the book, click the “Finish” button. To resume paused scanning, click the “Scan” button, or press Enter.
The result is a scanned book you can save to PDF or DjVu.
NAVIGATE
ABOUT US
ScanPapyrus Team develops home and office applications for Windows. Our programs are known for their high quality, user-friendliness and comprehensive design.
PARTNERS
![]()