How to add pages to an existing PDF
On October 5, we released ScanPapyrus 15.12. We continue improving our software, making it even more convenient for scanning to PDF. The new version's key feature is the option of adding scanned pages to an existing PDF file.
Previously, you could not add new pages to an existing PDF file. Instead, you had to rescan all pages of the document. Now you can scan a few pages, save them to PDF, and continue scanning tomorrow by simply adding pages to the existing file.

In fact, you could do that by using ScanPapyrus projects: Scan a batch of pages and save them to a file with the extension .scppy (ScanPapyrus's internal format). Then add more pages to your project, and finally save the complete project as PDF. However, this method only works if you save the job as a ScanPapyrus project, not as a PDF document.
In the dialog window for exporting to PDF, there is a new Add to existing file checkbox. If you select that option, you will be offered to select an existing PDF file. Browse to it and click the Save button. As a result, the new pages will be appended to the that file.

The new ScanPapyrus has one more new feature – the ability to save only the selected pages of your project, instead of the complete project, to PDF. Tick the pages that you need in your ScanPapyrus project and click the Save to PDF button. Only the selected pages will be saved. If you have not selected any pages, the entire project will be saved. The preview will show you which pages are going to be saved. This option is also available when saving to the DjVu or graphics files.

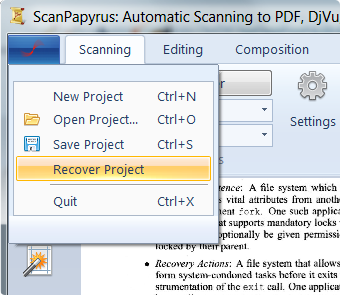
The new version has yet another important feature: project autosaving. It allows you to restore all scanned pages in case of a hardware or software failure. To restore an autosaved project, click the Restore Project button in the software system menu.

Moreover, now you can select scanned pages by pressing the Up and Down arrow keys.
