How to create a PDF from existing image files
Earlier we wrote about the remarkable convenience ScanPapyrus provides for the scanning of documents and books. Today, I’d like to tell you about another feature of the program. Now you can create a PDF document from existing files in the JPEG, TIFF, BMP and PNG formats. Let’s take a look at an example. Owners of multifunction printers surely have lots of scanned documents.
So, let’s take a look at how to create a PDF document from individual images. Let’s say we have images of a scanned paper document.
First, run ScanPapyrus and click the Add Image from File button. Add all scanned pages of the document, one by one.

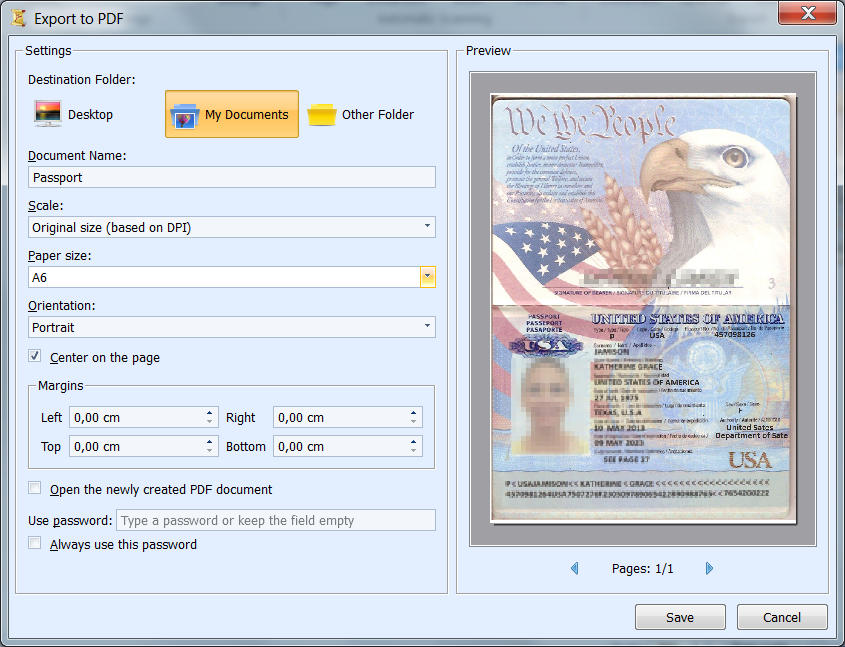
Then, click the Create PDF document button. In the opened window specify the following settings:
Document name: My document
Set all margins to 0 and set center alignment.
Click the Save to PDF button. As a result, we receive a PDF file.
So, in few simple steps you can create a PDF document from scanned images. I recommend turning most of your paper documents to their digital PDF copies. Not only does this help to manage them easier, but also provide additional security in case paper documents are lost.
NAVIGATE
ABOUT US
ScanPapyrus Team develops home and office applications for Windows. Our software is known for its high quality, user-friendliness and comprehensive design.
PARTNERS
![]()