The application's main window
Contents
ScanPapyrus’ main window consists of six parts:
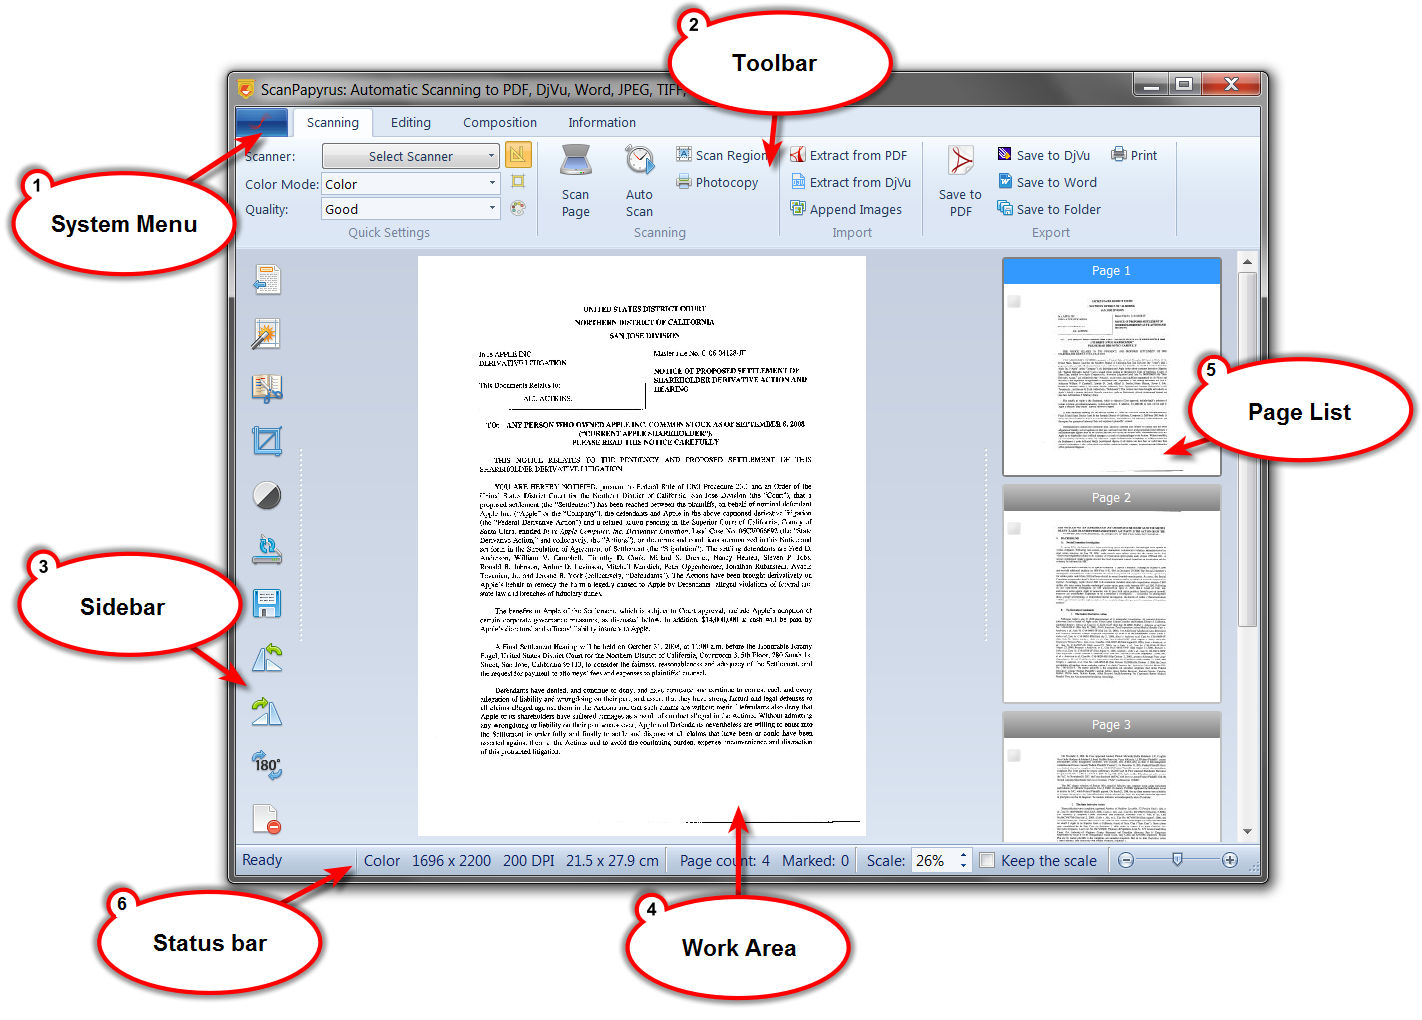
1. System menu
The System menu, which opens in the top-left corner just below the blue button, contains commands for managing the scanning project. A scanning project is a list of scanned pages or images imported from external files. You can save the scanning project to an external file. This approach is handy when you need to work with multiple documents. For example, you can put aside the scanning of one document after saving its project, start scanning another document, and then get back to the first document. Or, when scanning a big document, you can stop the scanning, save the project, and continue scanning the document on the next day. The scanning project is stored in a file with the .scppy extension.

The following commands are available in the system menu: New Project, Open Project, Save Project, Recover Project, Settings, and Quit.
-
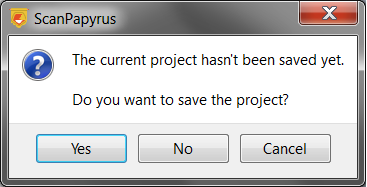
The New Project command creates a new scanning project. If the current project has not been saved yet, the application will prompt you to save it.
-
The Open Project command allows you to load an earlier-saved project. You will be prompted to select a file with the .scppy extension.
-
The Save Project command saves the scanned pages to a file with the .scppy extension. You will be prompted to select a folder and enter the name for the project file.
-
The Recover Project command allows you to recover a project in case of an unexpected failure or hangup of the application or the operating system. Project recovery is possible because the application automatically saves each scanned page to the hard drive.
-
The Settings command opens the Settings dialog box. See the ScanPapyrus settings section.
-
The Quit command closes the application. If the current project has not been saved yet, the application will prompt you to save it.
-
The system menu also contains a list of recent documents for quick access to earlier-saved projects. The list of recent projects contains both ScanPapyrus project files and exported files (PDF or DjVu).
2. Toolbar

The toolbar consists of a few tabs, each of which groups similar commands.
-
The Scanning tab contains commands to scan pages, import images from external files, and export pages to external files. See the Scanning section.
-
The Editing tab contains commands to edit a page. See the Editing section.
-
The Composition tab contains commands for managing the page order in the scanning project. See the Composition section.
-
The Information tab contains auxiliary, informational, and service commands. See the Information section.
-
The Style menu allows you to select the external style for the ScanPapyrus user interface (for example, the Microsoft Office 2007/2010 style).
3. Sidebar
The sidebar contains the following commands.
The Restore the Original Image button restores the original page. You can use it to roll back all changes and get back to the original image. It is a group operation, which is performed on all marked pages. If you have not marked any pages, the operation will be performed on the current page only.

-
The Auto Cropping button automatically crops the page to remove unnecessary white margins or black stripes caused by scanning with the scanner’s lid open. It is a group operation, which is performed on all marked pages. If you have not marked any pages, only the current page will be cropped.

The following parameters can have an impact on the result of automatic cropping:
- Auto Contrast

If this button is pressed, the application will automatically adjust the contrast when cropping the page. - Insert margins. You can set the margins via the Settings dialog box, in the Cropping section. The specified margins will be added to the cropped image. This option may be useful if the text in the cropped page is too close to its border.
- Auto Contrast
-
The Split the book spread into two pages button allows you to split of a pair of facing pages into two separate pages. For a successful splitting, the facing pages must be positioned correctly: The left page must be on the left, and the right page on the right. Then the page order will be preserved in the output document.

-
The Auto-Sort by Page Number button allows you to sort the scanned pages by page number: ScanPapyrus will recognize page numbers and sort the pages accordingly. For more details about the auto-sorting mode, read the Composition section.

-
The Crop the Image button switches the application to the cropping mode. For more details, see the Editing section.

-
The Brightness/Contrast Adjustment button opens the brightness/contrast adjustment dialog box. For more details, see the Editing section.

-
The Rescan the Page button starts scanning and replaces the current page with the newly scanned image.

-
The Save to File button allows you to save the current page to an external image file. The following formats are supported: JPEG, TIFF, BMP, and PNG. When saving to JPEG, the image quality is set at 90 percent. When saving to TIFF, the RLE compression is used.

-
The Turn Left button rotates the current page 90 degrees counterclockwise.

-
The Turn Right button rotates the page 90 degrees clockwise.

-
The Flip Image button rotates the page 180 degrees, that is, turns it upside down.

-
The Remove Page button removes all marked pages or the current page. You will be prompted to confirm the removal.

4. Work area
The current page of the document is displayed in the work area. To scale the page, rotate the mouse wheel or use the hotkeys Ctrl+Plus and Ctrl-Minus. If the scale is too big for the whole image to be displayed in the work area, scrollbars will appear at the right and at the bottom, which you can use to scroll the page. You can also drag the page (hover the mouse over the work area, click and hold the mouse button, and drag the mouse) to scroll the document.
If you right-click the work area, a context menu will appear, which contains commands to perform operations on the page. The commands partially duplicate the ones available on the sidebar.
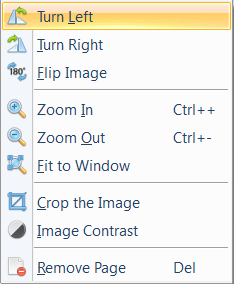
The following commands are available in the work area’s context menu:
Turn Left – Rotate the page 90 degrees counterclockwise.
Turn Right – Rotate the page 90 degrees clockwise.
Flip Image – Turn the page upside down.
Zoom In – Increase the scale by 5 percent.
Zoom Out – Decrease the scale by 5 percent.
Fit to Window – Set the scale in such a way that the whole page fits the work area.
Crop the Image – Switch to the manual cropping mode.
Contrast – Switch to contrast adjustment.
Remove Page – Remove the current page.
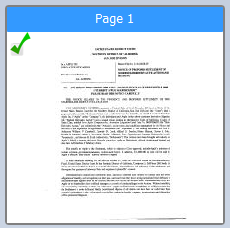
5. Page list
You can see the page list in the right part of the application’s window. Each page is represented by a thumbnail in a separate tile. At the top of the tile, you can see the page number. In the top-left corner, you can see a checkbox. It allows you to perform group operations (see Group operations), such as rotation, cropping, splitting into pages, and rollback (reversal of changes). Group operations are performed on marked pages only.
You can change the tile size by using the slider bar in the bottom-right part of the window.

If the tiles are small enough, they will be arranged in two columns.

Each tile has a context menu that pops up when you right-click the tile.

The following commands are available in the tile’s context menu:
Move Up – Move the current page up. (The page number will decrease. For example, page 2 will become page 1.)
Move Down – Move the current page down.
Move to Top – Move the page to the very beginning of the document. (The page will become page 1.)
Move to Bottom – Move the page to the very end of the document.
Move to Position – Move the page to an arbitrary position. (When a popup window appears, enter a new number for the page.)
Remove Page – Remove the current page.
6. Status bar
The status bar in the bottom of the application’s main window displays some useful information and parameters.

The status bar displays the following data:
The color mode for the current page (color, grayscale, or black-and-white).
Page size (width and height) in pixels.
Scanning resolution in DPI.
The physical size of the page in centimeters.
The total number of pages in the project.
The number of marked pages.
Page scale. (You can change the scale by using the respective control.)
The Keep the scale checkbox. (If it is checked, the same scale will be used when you switch from one page to another. If the checkbox is not checked, each page will be scaled separately in such a way that the whole page is displayed on the screen.)
The slider bar to set the scale for the page list.
See also
Scanning
Editing
Composition
NAVIGATE
ABOUT US
ScanPapyrus Team develops home and office applications for Windows. Our software is known for its high quality, user-friendliness and comprehensive design.
PARTNERS
![]()