Scanning documents, photos or books
Contents
The Scanning tab consists of the following subgroups: Quick Settings, Scanning, Import, and Export.

Quick Settings
The Quick Settings group allows you to change the scanning parameters quickly, without opening the Settings window.
You can change the following parameters.
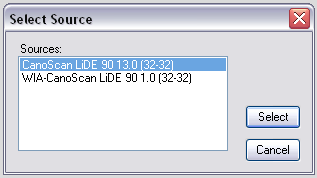
Select Scanner – This control opens the standard window to select a scanner.


When selecting a scanner, you need to select one without the WIA prefix. For example, you can see two scanner options in the figure above: CanoScan LiDE 90 and WIA-CanoScan LiDE 90. You need to select the first option, the non-WIA scanner. If only WIA scanners are available in your scanner list, you should download a driver for your scanner from its vendor’s website, which will install the TWAIN driver. Though ScanPapyrus can use WIA drivers, we cannot guarantee a trouble-free operation in that case.
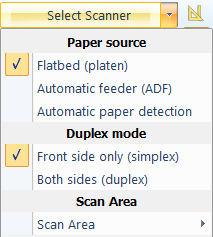
Clicking the “Select Scanner” button will also open a drop-down menu that allows you to quickly change the scanning parameters. The menu duplicates the settings of the Scanner section in the Settings dialog box (see Settings).

Color Mode – Select the color mode for scanning. The following options are available: color, black-and-white, and grayscale. To select the color, use the Color drop-down list.

Quality – Select the scanning resolution. You can select any quality preset, or set the scanning resolution manually.

The following presets are available:
- Medium – 200 DPI
- Good – 300 DPI
- High – 600 DPI
You can change the default DPI values via the Settings dialog box (see Settings).
You can also set an arbitrary scanning resolution. To do it, select Manual in the Quality drop-down list. A text field will appear to specify the scanning resolution.

The Quick Settings group also contains three buttons (on the right) to set the parameters for postprocessing the scanned pages.
The buttons control the following parameters.
Auto Deskew – Automatically deskew slightly skewed pages. This option is useful if a page has been skewed in the scanner. Keep in mind that deskewing slightly deforms the original page, which may be noticeable at low scanning quality.

Auto Cropping – This option automatically crops pages to remove unnecessary white margins, and also cuts off black stripes caused by scanning with the lid ajar. This operation may take some time. The higher the scanning resolution, the longer it takes to process the scanned page.

Auto Contrast – Automatically adjust page brightness and contrast. If you scan documents using this option, whitish background will become white, and dark areas (letters or other characters) will become darker and sharper. Please note that using this option with color scan mode may cause color distortion. We recommend that you use this option for grayscale scanning only.

Scanning
The Scanning group contains a few buttons for scanning.
Clicking the Scan Page button will start scanning the page in the selected scanner with the specified Color and Quality parameters. When the scanning is complete, the page will be processed according to the Auto Deskew, Auto Cropping, and Auto Contrast settings.

Clicking the Batch Scanning button will open the Batch Scanning wizard. For more details about the Batch Scanning mode, see the Batch scanning section.

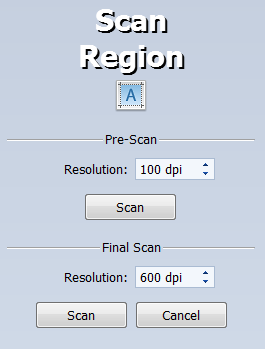
The Scan Region button allows you to scan part of the page with high resolution.

Region scanning is done in two steps. First, the whole page is pre-scanned with low resolution (100 DPI by default). The scanned page and the region selection rectangle will appear in the work area.

Set the final scanning resolution (for example, 600 DPI) using the control in the bottom-right part of the dialog box, then start the final scanning. The selected region will be scanned with the specified resolution.

This operation is useful if you need to scan only part of the page with high resolution. This way, you don’t need to scan the whole page with high resolution and then cut out the necessary part. It is much faster to scan only the necessary part with high quality.
Tip: Do not move the page in the scanner between the pre-scanning and the final scanning, otherwise you may not get the wanted region scanned with high quality.
The Photocopy button starts scanning with the current settings, and then prints the scanned page on the default printer. That is, the application will emulate a copying machine.

The Rescan Page button rescans the page in the scanner with the specified settings and replaces the current page in the project.

Import
The Import group contains buttons for adding pages from a file on a hard drive to the document. You can add pages from PDF or DjVu documents, or from JPEG, TIFF, BMP, or PNG image files.
The Extract from PDF button allows you to select an input PDF file to import images from. Only images will be loaded, and any text will be ignored.

The Extract from DjVu button allows you to select an input DjVu file to import pages from.

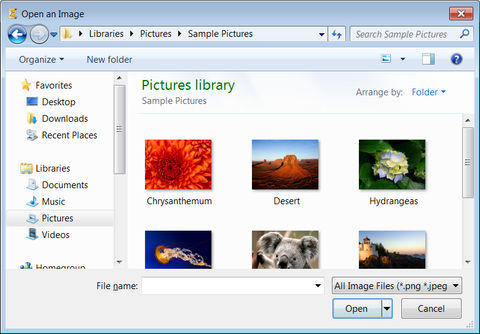
The Append Images button allows you to select one or more JPEG, TIFF, BMP, or PNG files. Each file will be added to the project as a separate page. To select multiple files, hold the Ctrl or Shift key when using the file selection dialog box.

You can also load a multi-page TIFF file. Each page of the file will be loaded as a separate page.

Export
The Export group contains buttons to save a scanned document to a PDF, DjVu file, or to multiple image files. You can also print the document on a printer.
The Save to PDF button opens the dialog box with different settings for saving to PDF. The scanned pages will be saved to a PDF file with the specified settings. The application will not OCR the pages, but will save them as images. Thanks to that, each page will look exactly as its paper original.
For more details, see the Save to PDF section.
The Save to DjVu button opens the dialog box with different settings for saving to DjVu. The document will be saved to a DjVu file with the specified compression ratio.
See the Save to DjVu section.
The Save to Folder button allows you to save the scanned pages as multiple image files of the specified format. In the dialog box, you can select the format (JPEG, TIFF, BMP, or PNG) and additional parameters (for example, the compression ratio for JPEG, the multiple pages option for TIFF, etc.).
See the Save to a folder section.
The Print button sends the scanned document to the printer.
For more details, see the Document printing section.
See also
Editing
Composition
