Save the document to PDF
Contents
When you have completed scanning a document or book, you can save it to a PDF file.
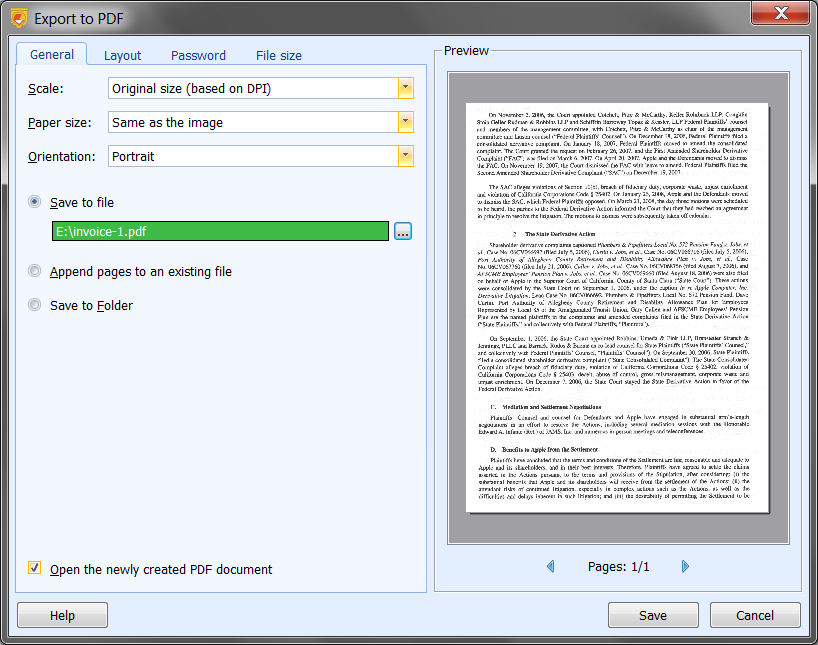
The “Export to PDF” window consists of two parts: the PDF export settings on the left, and the document preview area on the right.

The export settings are divided into three parts: General, Layout, and Password.
General
The General tab contains the following parameters.
Scale – Set the scale for the document page in PDF.

The following options are available:
Original size (based on DPI) – Keep the original page size. If a page of the size A4 was scanned and the output page size in PDF is also A4, the scanned page will fit the whole page in PDF. But if a page of the size A5 (half of the size A4) was scanned, it will fit only half a page in a PDF document of the size A4.
Stretch the image to fill the page – The scanned page will be stretched to fit the whole page in PDF. If a page whose size is a half of an A4 sheet was scanned, it will be stretched to fit the whole page in a PDF document of the size A4. Usually it results in quality deterioration and nonproportional stretching.
Stretch the image while keeping its proportions – An attempt will be taken to stretch the scanned page so that it fits the whole page in PDF, but the proportions of the original page will be preserved.
Paper size – Set the output page size in PDF. The following options are available: A4, Letter, A0, A1, A2, A3, A5, A6, and Same as the image.
The Same as the image option means that each page in the PDF document will be of the same size as the respective scanned image.

Orientation – Sets the page orientation in PDF. The following options are available: Portrait, Landscape, Automatically for each page, and Manually for each page.

The Automatically for each page option turns on automatic detection of page orientation for each page. If the document contains both portrait-oriented and landscape-oriented pages, the application will automatically orient each page in the PDF document.
The Manually for each page option allows the user to set page orientation for each page manually by clicking the Portrait and Landscape buttons (located near the navigation buttons). Use the navigation buttons to move from page to page, and set each page’s orientation.

You can use the PDF quality parameter to set the quality of the output PDF document. The following PDF quality options are available: Medium, Good, and High. The higher the quality, the larger the output PDF file size, and vice versa. In many cases, Medium is the optimal choice.

Save to file – This checkbox allows you to specify the output filename.

Below the checkbox, you can see the green file selection field. To select the file, click the green field or the three-dots button on the right. If you leave the field empty, ScanPapyrus will prompt you for the filename when saving.

Append pages to an existing file – This checkbox allows you to add pages to an existing PDF document. If you check the checkbox, the newly scanned pages will be appended to the end of the PDF file.

Below the checkbox, you can see the orange file selection field. You can specify the output file just like in the case of the green field (see above).

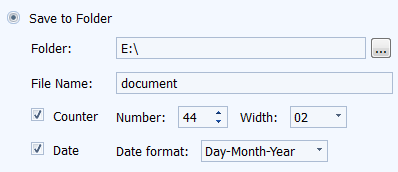
The Save to Folder checkbox allows you to save documents to the specified folder. The PDF filename can be generated by using the counter and the current date. The counter value increases each time a file is saved.

The Folder field allows you to specify a folder to save documents.
The Filename field allows you to enter a prefix for the filename. The counter value and the current date will be appended to that filename.
The Counter checkbox allows you to append an automatically incremented number to the filename. The number should be entered in the Number field. The value entered in that field automatically increases each time a document is saved, but you can also specify an arbitrary number. The number of digits in the counter value is determined by the Width field. That is, the value will be zero-padded to the specified width. For example, if the width is 3 and the counter value is 7, the value will look as 007. That string will be appended to the filename preceded by the underscore character.

The Date checkbox allows you to append the current date to the filename. The date format is determined by the Date format field. The following formats are available: YYYY-MM-DD (Year-Month-Day) and DD-MM-YYYY (Day-Month-Year). For example, December 20, 2016 will look as 2016-12-20 in the first case, or as 20-12-2016 in the second case. That string will be appended to the filename before the counter, preceded by the underscore character.

Open the newly created PDF document – This checkbox allows you to open the created PDF document in an application associated with the .pdf extension. For example, you can use Adobe Reader, STDU Viewer, or Sumatra PDF as a PDF viewer.

Composition
The Composition tab allows you to set the position of the scanned page on the page in PDF.
Margins – Set mandatory page margins. You can set the left, right, top, and bottom margins. These parameters are useful if the scanned page fills the whole page in PDF. If that is the case, the marginal parts of the page may be not printed simply because some printers have physical limitations on print area. You can avoid “printer-cropping” by setting margins.

Position – This drop-down list allows you to set the position of the scanned page on the page in PDF. The following page alignment options are available: Top-Left, Top-Center, Top-Right, Middle-Left, Center, and Middle-Right.

Password tab
The Password tab allows you to set the password for the PDF document.
Use a password – Enter a password for the PDF document in this field. The user will need to enter that password to open the document.

Always use this password – If you check this checkbox, the application will remember the password and suggest that you use it when creating other PDF documents.

File Size tab
The File size tab allows you to set an upper limit for the output file size. The current size of the output file is specified in the Current file size field.

The Limit file size checkbox allows you to limit the output file size.
Use the Maximum file size field to specify the maximum allowed size for the PDF file. Use the MB (megabyte) and KB (kilobyte) fields to specify the file size.
Preview
The preview pane on the right allows you to preview any page as it would look in PDF.

To switch from one page to another, use the blue < and > buttons below the preview pane. Between the buttons, you can see the number of the current page and the total number of pages.

Export to PDF
After setting up the necessary parameters, click the Save button.

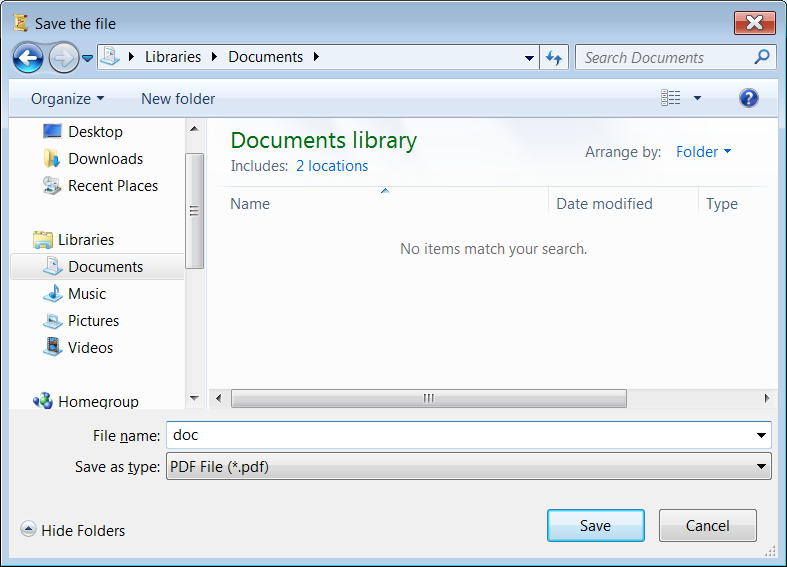
If you have not specified the output filename, the application will prompt you to specify it via the file selection dialog box.

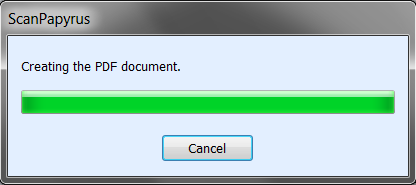
After that, the application will start exporting the scanned pages to PDF. You can check the export progress by looking at the progress bar.

When the file is ready, it will be opened in the default PDF viewer.
See also
Save to DjVu
Save to a folder
